Thursday, October 24, 2013

Creating vCenter Operations Manager Dashboards Using Customized Interactions Mode.

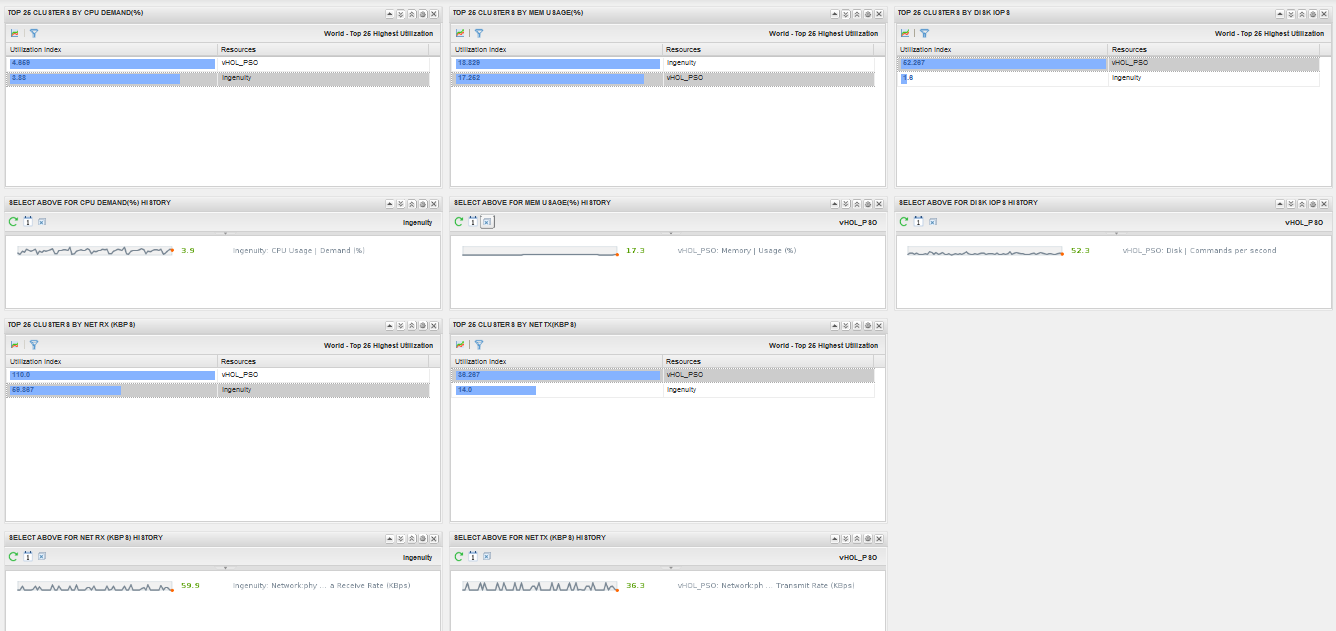
In my recent vCenter Operations Manager projects, I have extensively worked on customizing vCOps for customers to meet the needs of their specific use cases. In one such engagement, I was asked to build up a custom dashboard which shows all the key metrics of a selected object. The use case of this dashboard is to showcase 3 heatmaps, one each for Virtual Machines, ESXi Host and Datastore. These heatmaps would change colors from Green to Red once there fault score changes from 0 to 1. As soon as there is a fault with any of the VMs, Hosts or Datastores the color of the object changes to RED. Later you can click on the object and it will show the key metrics related to that object in the right pane (metric spark-lines). Look at the screenshot below:-

FAULT - METRIC DASHBOARD

Figure 1


This is possible using Heatmap widget on the left which showcases Faults and Metric Sparklines widget on the left. Then an interaction has been set between widgets as sown below in the screenshot.

Figure 2


These interactions are used by setting up the interaction mode in the Metric Sparklines and other similar widgets. Here is a screenshot which shows where the interaction mode is set:-

Figure 3
In the default mode the Interactions Mode shows the metrics which are shown in the above screenshot as soon as you select the object, however the requirement which I got was different.

I was asked to create a custom list of metrics which should be shown as soon as a VM, ESXi Host or a Datastore is selected from the heatmap. To meet this requirement, I had to find a way by which I can set the interaction mode to point towards a custom XML which would then show the desired metrics on the metric spark lines.

The custom-metric.xml which I wrote is shown below along with its description below:-

Figure 4


You can download this file from the following link - https://docs.google.com/file/d/0B9F7kU-3lhdfUWNvRXJTNUR0ejA/edit?usp=sharing

Once you have downloaded this file, you can change the thresholds or define new metrics or objects to solve your use cases. In order to get the details of all the metrics which are available for an object, you can login to vSphere UI and navigate to the operations tab as shown in the screenshot below:-

Figure 5


Your next task would be to upload this xml on the vCOps UI VM . Once it is uploaded we will be able to use this file for interaction instead of Default mode as shown in Figure 3.  The path on UI VM where u need to store this - 

/usr/lib/vmware-vcops/tomcat-enterprise/webapps/vcops-custom/WEB-INF/classes/resources/reskndmetrics

I will use winscp to move the "custom-metrics.xml" file to the above mentioned location on my UI VM and then give it the exact rights as other existing files which are available in this directory as shown is Figure 6 and Figure 7 below.

Figure 6


Figure 7


Alright, now we just need to edit the dashboard which I showed in Figure 1  and edit all the 3 widgets for VM Sparklines, ESXi Host Sparklines and Datastore Sparklines and click on the drop-down below Res. Interaction Mode to select the brand new interaction option which we just created and uploaded. See the screenshot below and you will notice the new custom-views option which is available now. Make sure to set this interaction mode for all the metric spark-lines widgets on by one.

Figure 8


Once you are done, you need to just select any VM, Host and Datastore in the left pane and now you will see the metrics which you asked for in the custom-views.xml file. See Figure 9 below and compare it with Figure 1 and Figure 4 and you will notice that the metrics shown now are the metrics which you defined in your xml file.

Figure 9


Now this can be really powerful as you can use this customization method to filter the metrics which you want in a dashboard rather than depending upon what is available out of the box. Let me know if you have any questions on this and I will be happy to help you.


Share and Spread the Knowledge. 


************Article Update - 27th Oct 2013*************

Another update to the article on the basis of discussions I had with my buddy Lior Kamrat. He has done some great work on vCOps and XMLs. If you have a super metric which you want to capture as an attribute key, you need to use the following format:-

"<Metric attrkey="Super Metric|sm_X" (X as number(ID) of the SM)


************Article Update - 25th Oct 2013*************

In the comments on this article, Matthew asked a question on how to get the "Metricattrkey" for a given metric. Please find my response in the comments section and also see Figure 10 below.

Figure 10


Tuesday, October 22, 2013

Preview of Custom Dashboards Available With vCenter Operations Manager 5.7.x.

With this blog, I wanted to showcase the power of custom dashboards in vCenter Operations Manager. In the past I have written about creating custom dashboards with vCOps. I would encourage you to read all those articles before you read this one. An easy way to access all those articles is through the page dedicated to vCOps on vXpress.

As mentioned in my introductory article about vCOps, the solution comes with 3 different user interfaces. In this article I would specifically talk about vCOps Customer User Interface.

With vCOps 5.7.1, VMware decided to provide some excellent custom dashboards pre-built into the solution. If you go through the release notes of the product, you would see the following section which talks about these dashboards:-

vSphere Dashboards in the Custom UI


The vSphere group in the Dashboards menu contains several default dashboards for managing virtual objects in a vSphere environment. These default dashboards are available to all members of the Administrators, Operators, and Users user groups. This release introduces the following default vSphere dashboards:

  • Troubleshooting Dashboard
  • VM Utilization Dashboard
  • VM Performance Dashboard
  • Host Utilization Dashboard
  • Cluster Utilization Dashboard
  • Datastore Performance Dashboard
  • Datastore Space Dashboard
  • Heatmaps Dashboard
  • Alerts Dashboard
  • Host Memory Dashboard

Let me run you through all these dashboards and show how you can use them in day to day operations management.

While in the previous release of vCOps, you required to create all the custom dashboards, the above mentioned release comes with these custom dashboards. The screenshot below showcases how these dashboards can be accessed and used.

To being with, let's log on to the vCOps Admin UI to check the version of vCOps I am running in my lab environment:-

1- Login to vCOps Admin UI - https://<admin ui ip address>/admin

2- The username to be used in 'admin' and the password is 'vmware' by default if you have not changed it during initial setup.

3- Click on the status tab and you can check the version of vCOps, you can see I am running 5.7.2 in my environment.


4- Now lets log on to the Custom UI - https://<admin ui ip address>/custom

5- Click on the Dashboards Tab -> vSphere (this lists all the custom dashboards which are incorporated in the 5.7.x realease:-


Lets ho through each dashboard one by one to see how it helps you to manage your VMware infrastructure:-

VM Performance Dashboard (click the image below to enlarge)

This dashboard showcases the key performance statistics of  top 25 virtual machines in your environment. This includes some of the key parameters such as CPU Ready%, Memory Swap In Rate, Memory Swap Out Rate, Write Latency, Ready Latency, Disk Commands Per Second (IOPS), Network Packets sent and Received Per Second.


Troubleshooting Dashboard (click the image below to enlarge)

This dashboard sis pretty interesting as it helps you to troubleshoot and find out the culprit objects for any performance problems in your virtual infrastructure. Here you can select an object you want to investigate, see its relationship with other objects in the virtual datacenter and also find out interesting metrics and latest events associated. This will help you to zero down on a root cause by correlation which can be a big help while troubleshooting issues.


VM Utilization Dashboard (click the image below to enlarge)

As the name suggests, this dashboard is focused on giving you utilization statistics for your virtual machines in your virtual datacenter. The dashboards uses the Top 'N' Analysis widgets to show the Top 25 VMs with CPU Usage, Memory Usage, Disk IOPs, Network Packets Sent and Received.


Host Utilization Dashboard (click the image below to enlarge)

As the name suggests, this dashboard is focused on giving you utilization statistics for your ESXi hosts in your virtual datacenter. The dashboards uses the Top 'N' Analysis widgets to show the Top 25 ESXi hosts with CPU Usage, Memory Usage, Disk IOPs, Network Packets Sent and Received.


Cluster Utilization Dashboard (click the image below to enlarge)

This dashboard can be used to focus on the resource utilization at a cluster level. It clearly indicates how much is used and available which can give you a clear picture around resource utilization in your clusters. This includes CPU Demand, Memory Usage, Disk IOPS, Network packets send and received.


Datastore Performance Dashboard (click the image below to enlarge)

This dashboard is by far the best resource I have used to troubleshoot performance issues in a vSphere infrastructure which are primarily due to issues in the underlying storage issues. This dashboard lists the top 25 Datastores with highest Latency and IOPS. The good part is that you can select the object (datastore) and see which VM within that datastore is driving the latency or IOPS. This is an easiest way to find the culprit VM or datastore.


Datastore Space Dashboard (click the image below to enlarge)

This dashboard helps you keep a track of the occupied space in your datastores. This is similar to the custom dashboard I showcased in my article - Using vCOps Super Metrics & Custom Dashboards to Display Datastore Usage % !!

You can select the datastore on the left which is showcasing the space remaining on the basis of colors, red being less space and green being enough space. On the right pane it shows the VMs which are utilizing this space and the widget below shows the metric sparklines.


Heatmaps Dashboard (click the image below to enlarge)

Heatmaps are a good way to showcase utilization and load with the effect of changing colors. This dashboard helps you to understand the load of your Virtual Environment across clusters 7 ESXi hosts. The metrics measured here are CPU, Memory, Disk and Network.


Alerts Dashboard (click the image below to enlarge)

I do not have a screenshot for this dashboard as I do not have any alerts in my virtual infrastructure. But yeah this alerts dashboard helps you to deal with all the alerts with the health of all the related objects and interesting metrics. This can help you do a 1st level root cause for the issue for which the alert is generated.

So you can see that there are a number of goodies available in the product out of the box. I would encourage you to upgrade the environment to 5.7.x release so that all these dashboards are automatically created in your vCOps Custom UI and you can use them to monitor your infrastructure more efficiently. Also try my other vCOps custom dashboard articles to learn how to create a custom dashboard.


Share and Spread the Knowledge. 


Sunday, October 20, 2013

vForum Mumbai - Register and Attend The Biggest Virtualization Event in India!


It's that time of the year when, VMworld SF and VMworld Barcelona are over. As always, there are a lot of of new announcements which have been made at VMworld 2013 and I am sure a number of you might have not had the time or the opportunity to be at the event. This should not worry you as VMware like every year would bring all the goodness of VMworld to you in a city near you through its popular event named vForum.

vForum 2013 is THE leading industry event for CLOUD, VIRTUALIZATION and MOBILITY, that provides the platform for IT professionals to break away from convention and to learn, share and exchange ideas on the new era of IT. Get insights and tools to break away from the pitfalls of the traditional computing paradigm by extending the benefits of virtualization to all data center services and radically simplifying and transforming your IT infrastructure.

You can find more details about the event on the following link:-


Although vForum happens all around the world, this link would take you to the vForum India event which is happening in Mumbai on 29th and 30th October 2013.
Event Details
Date:
29 - 30 October 2013, Tuesday & Wednesday                         

Time:
9.00am - 6.00pm

Venue:
Renaissance Mumbai Convention Centre Hotel

2&3B Chinmayanand Ashram, Powai
Mumbai 400087 

Event RSVP:
+91 93203 36457
Register Now

VMware Professional Services India Team @ vForum Mumbai

I am glad to share that VMware PSO India would be a part of this event and you can see my entire team in action during the event. Please ensure to be at the VMware PSO Booth to learn, share and win some exciting prizes.

At the same time please take out time to attend the session which I am going to present on Day 2 of the event. Here are the details of the session:-

***********************************************************************
Session Title - Architecting vSphere - Everything you wanted to know
Session Time - Day 2, 30th Oct. 2013 around 10:00 AM
Session Synopsis:::

Learn this and much more from our Professional services experts at the PSO booth. Insights on how to architect a vSphere environment – by VMware PSO Senior Consultant.

While Software-Defined Data Center is no longer a dream, it is important to carefully architect & layout the building blocks for this disruptive approach. Whether the foundation for your SDDC, a development cloud or a small business set up, Sunny’s extensive experience will help you on your journey towards a rock solid design.
***********************************************************************
Refer a Friend
Refer Now


For latest Information on VMware PSO, follow the gang on Facebook & Twitter. Subscribe to PSO India Weekly Newsletter to stay updated with the latest news & offerings.


Tuesday, October 15, 2013

Invitation to join - India's First Ever VCP Club. Come join the exclusive gang!

This article is specific to my India based audience who are VCP certified. The invite below is to call out the VMware Certified Professionals based out of India to join the exclusive LinkedIn Group - India VCP Club. I am trying to put across the word to all the fellow VCPs who can benefit from becoming a part of this exclusive group. Please refer to an official invite below which I received from VMware India a few days back. I thought this might be a great platform to come together and learn from each other and also benefit from the fantastic benefits which are mentioned in the mailer from VMware India below.

So go ahead and join the bandwagon.....


VMware is proud to be working with VCPs who invariably are transforming an existing datacenter to the next-generation Software Defined Datacenter. Behind every single dollar that VMware customers are saving, behind every single Green-IT initiative that various organizations are achieving, there are always one or more VCPs making it possible.

India-VCP Club is a new initiative from VMware to connect the thousands of VMware Certified Professionals in the country in order to enable them to leverage on the knowledge & skills available across the community.

Benefits of becoming a member of the VCP Club:
  • Privileged Entry to VMware technology events.
  • Exclusive access to Hands-on Labs on some of the latest & newest technologies
  • Exclusive access to Beta software
  • Discount vouchers for VMware Training (Advanced courses) & Certification
  • Opportunities to attend VMware sponsored premier industry events
  • Opportunity for VCPs to present on some of the most popular & sought after technology topics
  • Face-to-Face meeting / conference of VCP Club once every 6 months
  • Networking opportunity with peers working for a wide variety of organizations across the country
  • And many more exciting stuff....
So come together to Innovate, Share and learn on the world leading Virtualization and Cloud Infrastructure solutions!

Please Note:  A Linkedin account is mandatory to join this group - Only the VMware Certified Professionals (VCP) can join.

Launch Date: 1st October 2013
Click here to join the group on
If you face any trouble in joining please email at: indiavcpclub@vmware.com


As always - Share and Spread the Knowledge. 


Friday, October 11, 2013

Installing GravityZone-in-a-Box (GZiaB) in a VMware vSphere Environment..

This post is in continuation with my previous post which introduced the new launch of Bitdefender's endpoint security product for SMB segment called "GravityZone-in-a-Box (GZiaB). I would suggest you to read thats article to get an overview about the product, - "Bitdefender's GravityZone-in-a-Box - A thoughtful solution for Endpoint security!"

As promised before, I will now showcase step by step instructions to deploy this solution in your vSphere Infrastructure. As mentioned before GZiaB is a single virtual appliance with all the roles installed within, it is extremely simple to deploy and configure. Without further a do, lets being with the deployment.

DEPLOY GZiaB OVF

1- Deploy the OVA Template using vCenter Server
2- Browse of the GZIAB.ova file and click on Next


3- Review the details and click on Next


4- Give the Appliance a Name and Select the Folder where you want to deploy the appliance and click Next.


5- Select the appropriate Network Port Group and Click on Next. The IP settings will be configured later in the appliance interface.


6- Review the settings and click Finish to deploy the OVF.


Now, we will power on the Appliance and do the first time setup.

**********************************************

SETTING UP GZiaB

1- Once the appliance is powered on you need to setup for the password for the built-in admin. The username of this admin is "bdadmin". Right click and open a VMRC console to this appliance.


2- Now you need to use the same password to login and setup the appliance.


I will go through setting up each of the setting for my environment by selecting each option.

3- The following settings need to configured. Use your keyboard for going through the options and setting them up.


4- Start with setting up the host name and domain details.

5- Setup the network configuration.


6- Setup up MDM options if you need that for external communication.


7- If you select option 5 you will notice that all the roles which were deployed separately in Gravity Zone are bundled together in the GZiaB virtual appliance making it a true "IN A BOX" solution.


So that sets up the appliance for us. Now we need to use the web console IP to open the web interface on the webpage and start configuring the solution and protecting virtual machines.


CONFIGURING GZiaB

1- Use a web browser to open the web console to configure it. Remember this User Name and Password is for your subscription with BITDEFENDER. Create one if you do not have one by clicking on the link - I don't have a MyBitdefender Account.


2- Once logged in License the product


3- Create a root account. This is the super admin user which you will use to login into the appliance. You can create more users with Role Based Access Control which I will showcase later.


So far you have 3 passwords, one for bdadmin, 2nd one for your bitdefender subscription account and the third is the root account which I have named as 'wickedsunny'. Once the account is created we will get on the Home Page of the appliance.

4- Close the preview screen to get to the configuration page.


5- Now you have 6 Menus on the top of the screen. Let's quickly tour them one by one.


6- Click on the Integration Tab to integrate with AD.


7- Click on Virtualization to add the vCenter Server as shown in screenshots below


8- Provide the credentials for the vCenter Server to complete the integration


The vCenter Resources with now synchronize with the appliance and might take a few minutes.

9- Select the Settings tab and configure the Mail Server, Proxy and Time Source under Miscellaneous tab.


10- Click on the update Tab to update the GZiaB appliance.


12 - Make sure you the correct update settings. You can update the same using the Update Server option.


13- The Certificates and License Status tabs are self-explanatory. Let's jump to the Account section and create a user. You can also pull down the user from the AD integration.


14- And finally the Logs TAB which shows the Audit Logs.


PROTECTING WORKLOADS USING GZiaB

Now that we have the appliance read, we can logout and login with the administrator use which we created in STEP 13. This will give us a new interface which will help us to protect the workloads. While I will encourage you to explore the options on this screen, since there are various options you have to setup your own  customized Anti-Malware policies, I will go with the Default Policy to protect one of the VMs in my lab.

1- Click on Network Tab  Select the Resource Pool/Cluster or Datacenter where your workload is located from the left pane. This is similar to the inventory objects in the vCenter. Select the VM where you want to install the Anti-Virus client and click on the Tasks button on the Left top corner and click on Install Client.


2- Confirm the IP address and credentials for this workload. You can setup multiple account or have a domain account pushed as local administrator through AD policies. Select the credential and click on Save


3- Click on Network - Tasks to check the status of the install. Once done, you would see that the agent is installed via network on the Target machine and the defined policy starts working with immediate effect.


Well hope this gives you enough information on deploying the solution and using it.To reiterate, this solution is a simple install and configuration and can get you going a few minutes. So go ahead, and secure your environment to ensure efficiency & control on your virtual infrastructure and keep the bad things at bay.


Share and Spread the Knowledge.